
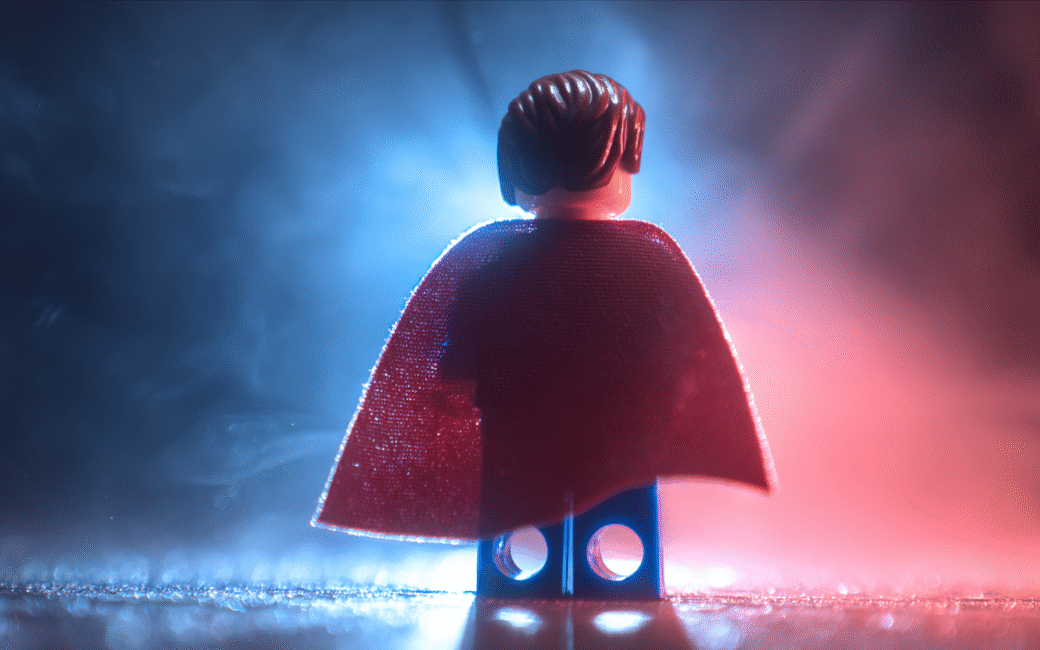
Artists know this feeling. You want to make something today, but the studio is booked and your schedule is packed. Superhero minifigs are perfect for those in between moments. This post shares superhero minifig photography tips that use what you already have, like a desk lamp and a scrap of paper. No softboxes. No fancy rigs. Just tiny heroes and smart light. If you’re looking for affordable minifigures to buy online, best place I’ve found that has all the options for good prices is here.
Light first, gear second
Light is the difference between flat and dramatic. A desk lamp at arm’s length can do more than a big kit in the wrong place.
Put your minifig on a dark book or a matte cutting mat. Aim the lamp from the side so the face is half lit and half in shadow. That split sells comic energy. Tilt the lamp until the eye highlights pop. Then stop. Take one test shot, adjust a few degrees, and take another. This small move is the secret no one talks about.
If your lamp is too harsh, pass the light through a sheet of copy paper. If highlights blow out, move the lamp back. A ruler’s length makes a huge difference at this scale.
Backgrounds that do not fight your subject
Keep backgrounds simple. Printer paper for white. A piece of black foam for deep space. A dark denim jacket for a gritty street wall. You can also fold a sheet of colored paper into a gentle curve so there is no visible edge behind the figure. That seamless curve feels pro without any heavy setup.
For city vibes, place the minifig in front of an old comic page. Angle the lamp so the page is dim and the figure is bright. The human eye reads that priority as story.
Angles that feel like panels
Shoot low so the hero reads as tall. A slight upward tilt hints at power. For a chase scene, rotate the camera a few degrees so the horizon leans. That tilt creates motion you can feel. A close crop on the face gives you mood. A wide crop with boots and ground gives you context.
If you want a quick rhythm, take three shots in a row. Face close-up. Mid shot with pose. Wide shot with background. That trio cuts together like a comic strip on your feed.
Posing that reads from across the room
Minifigs are simple. That is a gift. Bend one arm to hold a tool or a shield. Rotate the head a bit so the printed eyes catch light. Spread the feet wider than you think you need. Those small choices make the pose read at phone size.
If your figure has a cape, curve it gently so it catches a sliver of light. If the cape is stiff, wedge a tiny bit of paper under it to lift one edge. Remove the paper before you shoot.
Color and mood from ready-made proxies
Now for the fun crossover. If you keep a stack of Pokémon proxies at your desk, treat them like a mini palette book. The colors in older Base era art are flatter and warm. Gold Star style art pushes contrast and metallic accents. EX era leans saturated with sharper highlights. When you test a background color, pull a proxy that matches your plan, then tune your lamp’s angle to echo that mood.
This is not about photographing the cards. It is about borrowing their visual language. A fire type palette suggests orange rim light on a red suit. A water type palette invites cool shadows and bright specular highlights on a chrome helmet. If you are teaching or mentoring, this is a low pressure way to talk about hue, value, and contrast without opening a color wheel app.
Superhero minifig photography tips for tiny sets
You can stage a scene with things sitting on your desk. Here are fast setups that look deliberate.
- Night alley. Black foam base, a pencil cup with holes off to the side, lamp shining through the holes. Instant bokeh dots.
- Rooftop moment. Gray book as the roof, white paper as sky, lamp angled low for long shadows.
- Lab glow. White paper base, glass of water behind the figure, lamp shining through the glass. Gentle caustics for a sci fi feel.
- Streetlight scene. Stack two books at different heights. Place the figure on the lower one. Hang a small keychain light from the upper book to fake a streetlight. Keep it subtle.
Props that make sense and do not steal the shot
Use tiny, matte props. A cut straw becomes a pipe. A broken pencil tip becomes rubble. A folded paper triangle becomes a distant building. If a prop shines, it will hog attention. Tap it with a soft pencil to dull the sheen.
Keep color harmony in mind. If your hero is blue and red, pick a neutral ground. If your hero is black and gray, a muted green card behind them adds life. Your proxy stack is handy here. Hold a card next to the scene and judge the mix with your eyes.
Focus and blur without special lenses
Most phones can do this now. Get close enough for the face to be sharp, then tap to set focus. If your phone supports portrait mode for small objects, test it. Sometimes it works, sometimes it melts edges in a strange way. If it struggles, move back an inch, then crop later.
On cameras, a basic kit lens at its longest focal length with a wide aperture will blur backgrounds just fine. Support your hands on the table to reduce shake. A two second timer keeps you from nudging the shot at the moment of capture.
Edit quick, publish faster
In the phone editor, try three moves. Raise contrast a touch. Pull highlights down if the face is shiny. Add a tiny bit of vignetting to keep the eye in the frame. If a color cast creeps in, slide white balance slightly warmer or cooler. Save a preset so the next set of shots takes two taps.
If you post to a portfolio or social, group the three shot sequence mentioned earlier. It reads like a story without long captions.
Showcasing ready-made proxy sets artists will like
Since we are talking about visual inspiration, here are a few ready-made proxy eras that pair well with superhero scenes.
- Base era throwbacks, for flat warms and simpler shapes that suit retro heroes
- Gold Star style, for high contrast shots with sharp highlights and reflective accents
- EX era sets, for saturated color that plays well with capes and chrome visors
- Modern full art era, for bold background gradients that guide light choices
You can reference a card’s palette to plan your scene. Pick two dominant colors and one accent. Let the figure carry the accent. Let the background carry the dominant. Let the light carry the second dominant through reflections.
If you need a simple source, I get mine from nerdventure.com.
Troubleshooting without losing the mood
If your cape blows out, move the lamp higher. If the face is dark, tilt the head until the eyes catch a pin of light. If the base is too reflective, lay a sheet of paper under the figure. If the shot feels busy, simplify the background. The best fix is often to remove one thing, not add one.
A tiny repeatable workflow
Here is a fast routine you can do any day.
Pick a hero. Pick a proxy card palette. Build a two item set, like a book base and a paper background. Set the lamp to the side. Shoot one close, one mid, one wide. Edit contrast, highlights, and vignette. Post the trio as a mini story. Total time, twenty minutes if you do not overthink it.
Why this matters for a community art site
At Art Love Magic, the goal is simple. Help people make more art. Superhero minifig photography tips like these get artists moving, even when the gear is limited and the day is full. Tiny sets teach big lessons. Directional light. Color choice. Composition. Story beats. You can practice all of that at a desk before dinner. And if you teach or mentor, a small minifig kit with a few ready-made proxies becomes a traveling studio in a pouch.
Final nudge
Try one scene tonight. One lamp, one figure, one idea. If it flops, you learned something. If it sings, save the setup and repeat it with a new pose and a new palette. Keep the process light so you return to it tomorrow.